When it comes to developing themes and plugins, you need the right tools to finish the job quickly and efficiently. There are a plethora of tools to choose from, and your selection can vary by personal taste. Some go for open-source tools like GIMP and Nvu, whereas others stick with trusted commercial applications like the omni-present Adobe Photoshop and Macromedia Dreamweaver. Whatever your choice maybe, it is essential that you like it and stick with it.
![]()
Testing your themes and plugins can be a big head ache, as you have to reload the page every time, consuming bandwidth. Bandwidth is precious, unless you own a dedicated server at MediaTemple or something(!). Also, any edit has to be uploaded before previewing. This gets tiresome, and you would have wondered whether there is an easier way.
Linux users have the LAMPP(Linux, Apache, MySQL, PHP), which is easy, but Windows users are mostly unaware of a similar package. It is called XAMPP(XP, Apache, MySQL, PHP). Once you install it, you can setup WordPress locally, and test your plugins/themes/hacks offline. You save bandwidth, effort and time.
Here are the steps for installing WordPress locally:
- Download the lite version of XAMPP, called XAMPPlite Choose the
.exeversion. - Install it at a partition of your choice. Here, we are using C drive.
- Go to the install folder, that is C:\xampplite. Double-click the
xampp-control.exefile, and start up MySQL and Apache services in the dialog box that follows. - Go to
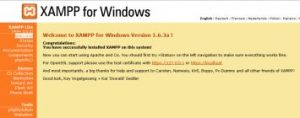
http://localhost/in your browser. From the left column, choose your language. - Click on phpMyAdmin in the left column(see image below).
- In the “Create New Database” Field, enter “wordpress” (without quotes), and select utf8_unicode_ci in the drop down box in the next field. Click Create. XAMPP setup is now complete.
- Download WordPress.
- Unzip it to
C:\xampplite\htdocs
You should have a wordpress folder in htdocs. Go to it, and open upwp-config-sample.php. - You will see a list of default values. Change them to below(do not copy-paste this, just find the required info and update the file):
define('DB_NAME', 'wordpress'); // The name of the databaseRename the file as
define(’DB_USER’, ‘root’); // Your MySQL username
define(’DB_PASSWORD’, ”); // …and password (needs to be empty, just for local install)wp-config.phpand save it. - Go to
http://localhost/wordpress/wp-admin/install.phpin your browser, and follow the steps.
You’re done. Now, use the wordpress folder as you would on your webserver, and upload the plugins, themes etc. to test. I recommend doing this before attempting a manual install in your server ( if it doesn’t have one-click installer). Now, go and test to your heart’s content ![]() I am having a great time testing, and the instant page loads of my dummy blog looks great.
I am having a great time testing, and the instant page loads of my dummy blog looks great.